The original article was published on https://hackaday.io/project/187518-hgdeck on 2022/09/28. The article is published here for archival purposes.
Motivated by the 2022 Cyberdeck contest, I decided to build one. First I thought of submitting my old hgTerm project (Raspbery Pi based mini laptop for field use, https://hyperglitch.com/articles/hgterm) but then I decided to make something a bit more fun.
This one is less of a practical field use and more of a fun cyberpunk-ish prop. It's a wrist-wearable, (not) voice controlled, dual mode (screen/full terminal) device.
UPDATE: As the project log shows, there were a lot of fails during this project so there's no thermal camera and voice control. But it still looks cool :)
This time I decided to build it just with the stuff I have laying around (luckily, I have a lot of stuff laying around :)).
Device is based on the Raspberry Pi Zero W Soc. It contains one main 3.5" SPI TFT screen and additional 1" OLED screen. Additionally, it has BT keyboard, pi camera and MLX90640 thermal camera. The casing is 3D printed on Prusa Mini. It has a motor and a linkage system which enables it to (semi) automatically switch between just the display mode and full terminal (display+keyboard) mode.
Table of Contents
Initial stuff
After some thinking about what would be fun to build (and also giving myself a limit that it can only contain stuff that I already have and shouldn't take longer than a few days to build) I decided on a convertible form factor but with an automatic open/close mechanism. To initiate mode change I also decided to go with voice commands. And since the keyboard I had is a bit wider than the display, I decided to add another small display.
The idea is to have it mounted on a wrist and it can show and capture image in front of it but also it can switch to terminal mode where the keyboard can be used.
The keyboard I had is the one I purchased some time ago and it's a really nice one - keys are quite acceptable and it can pair and switch between two devices. Unfortunately I can't find it any more (the original purchase link is https://www.aliexpress.com/item/4000041976542.html)
For the mode changing mechanism I decided to design some sort of linkage capable of switching the modes and use a small servo to drive it.
So, after some initial 3D modeling and deciding on placement I ended up with this:

Software shenanigans and voice recognition
So, I have two main, not-so-straightforward things to solve: configure the TFT display and setup the voice recognition.
To get this display to work, a hardware overlay needs to be added, which sets up the framebuffer on it (with a quite bad fps rate, but that's not that important here) and after that, in order to use it for Xorg (GUI) an additional piece of software called fbcp is used which basically copies image from the Xorg session to a framebuffer which is displayed on the screen. The simplest way to get all of this is to just use the SD card image provided by Waveshare. The downside is that it's not really a recent OS version.
For the voice recognition I initially wanted to use something as simple as possible - there's no need to actually recognize the speech, just to compare the sound with the one stored locally (remember the voice dialing on old Nokia phones?). Unfortunately, I couldn't find anything like that (edit: there was a snowboy hotword detection few years ago, and there are few other hotword detection libraries I found later). Building it from scratch probably wouldn't take too long but it would take more time than I wanted to spend on this. So I decided to go with voice2json (https://voice2json.org/) which can use few different backends (both online and local) and handles a lot of boring stuff. Well, unfortunately, after installing it it complained about the libc being too old... So I decided to try to upgrade the OS which, after a lot of time, broke the Xorg configuration for the display.
The second try was to start with fresh OS image and then configure the display. The basic framebuffer support was easy to setup (basically, clone the https://github.com/swkim01/waveshare-dtoverlays , copy the relevant files and run it and it worked) but fbcp was crashing with SEGFAULT.
After some time thinking about dropping the whole project, I decided to go again with the waveshare image and try to use something else for voice recognition.
While still using the latest OS image, I found the SpeechRecognition python module (https://pypi.org/project/SpeechRecognition/) and tested it. It (partially) worked: the sound coming from microphone was quite noisy but after disabling the automatic gain control for the microphone using alsamixer and yelling at the microphone a bit louder, it managed to recognize a phrase. Unfortunatelly, using offline recognition turned out to be really slow. But using some online backend gave relatively fast response so I decided to drop the offline-only requirement.
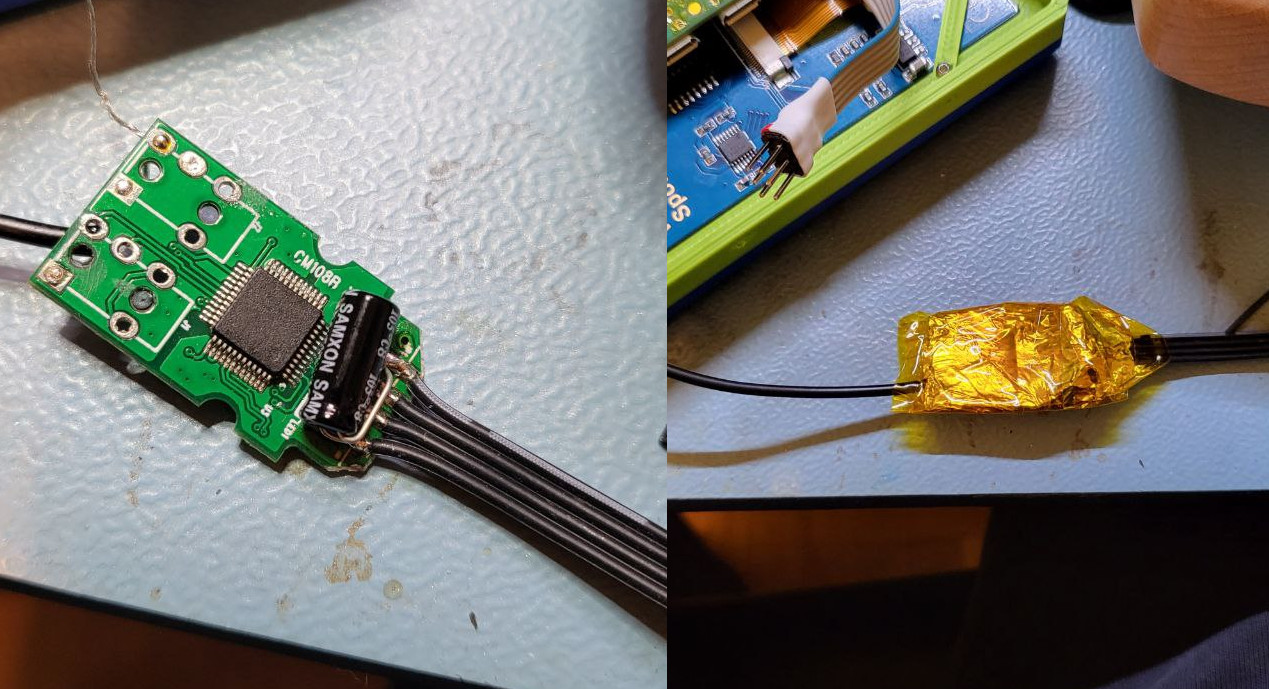
The other problem was noisy microphone signal probably caused by the power supply and other noise. Adding the 100uF capacitor to the USB soundcard board, removing the connectors to make it smaller and shielding it by wrapping it into some grounded aluminum tape turned out to be a good solutions and the noise level dropped significantly.

After I switched back to the OS image provided by waveshare, I realized that SpeechRecognition required newer python. That was easily (with some 30-60 minutes of compiling time) solved by compiling the Python 3.9 (here's one of the guides: https://tecadmin.net/how-to-install-python-3-9-on-debian-9/)
I also managed to combine arecord and a custom python script in order to display the microphone waveform on the I2C screen (code available in the repository).
That was enough of software for now.
Mechanical linkage
By using precise scientific approach and materials (i.e. a bit of foam board and a few nails) I "designed" a mechanical linkage which can move between two required positions.
Based on that I added a bunch of holes in the keyboard case and a few holes on the levers to try out different lever lengths and fixing positions to get something similar to the prototype.
Unfortunately, as I assumed but for some reason hoped it won't happen, the mechanisms on both sides need to be coupled for it to work properly.
After some more time in FreeCAD, I added the coupling shaft (i.e. M4 threaded rod) to the front side to drive two levers together. Motion from servo was transferred using two gears with same number of teeth.
This worked well from the mechanical side but unfortunately (again), to move the whole deck the servo required a bit more current than the battery could provide (the battery protection kicked in). And since it can only move 0-180° I couldn't add gears to reduce the required torque.
The (partial) solution was to replace the servo with a geared DC motor. I also added the hall sensor inside and mounted two magnets on the bottom part to detect the end positions and stop the motor. The one I have isn't perfect as the gearbox on it doesn't have the required ratio so even with additional 3D printed 1.85:1 gears (higher ratio probably wouldn't fit) it still doesn't have enough torque to start lifting the screen. But with just a bit of manual help it manages to do it. There's quite a bit of backlash and the close operation is quite fast so I might replace the motor with the slower one at some point.
Cramming it all inside
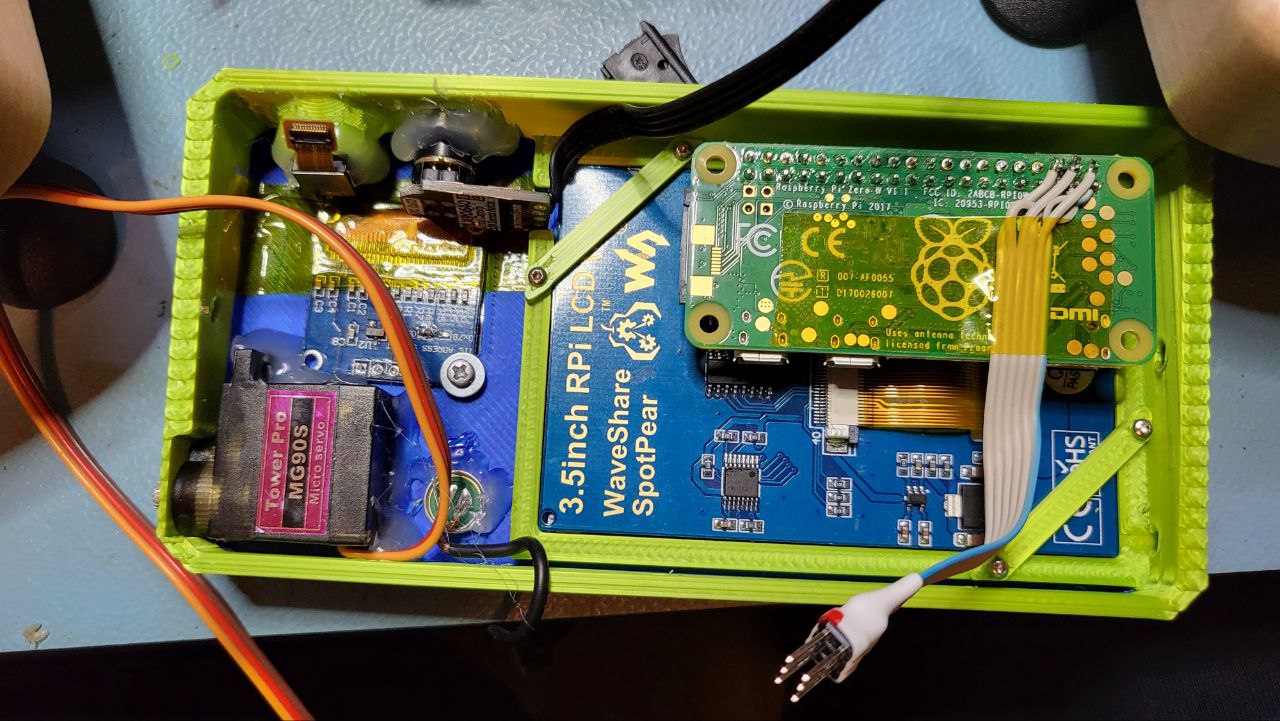
A few words about the (messy) insides.
Initially I started with the idea of planning and placing every bit in 3D software. Very soon that transformed into hot-gluing things in place which then turned into "just cram it all inside and hope to be able to close it". The downside of that (besides the obvious one of looking ugly and hard to repair) is that after mounting most of it inside I was too lazy to print out the new case and move everything when I had to make some changes so the slot for the power switch and battery charger are made by cutting and melting the parts of the case (the power switch looks ok, but the battery charger port leaves a lot to be desired :).

So, how is it all connected inside? We have a battery (some 1300mAh LiPo which I had from another project) connected to the standard AliExpress charger/protection (newer versions come with USB-C connector but this one still uses the micro USB). The charger output goes, through a power switch, to the boost DC/DC converter which steps up the voltage to 5V to power the pi. The motor is also powered from that 5V line and the sensors are connected to the 3.3V line from the Pi.
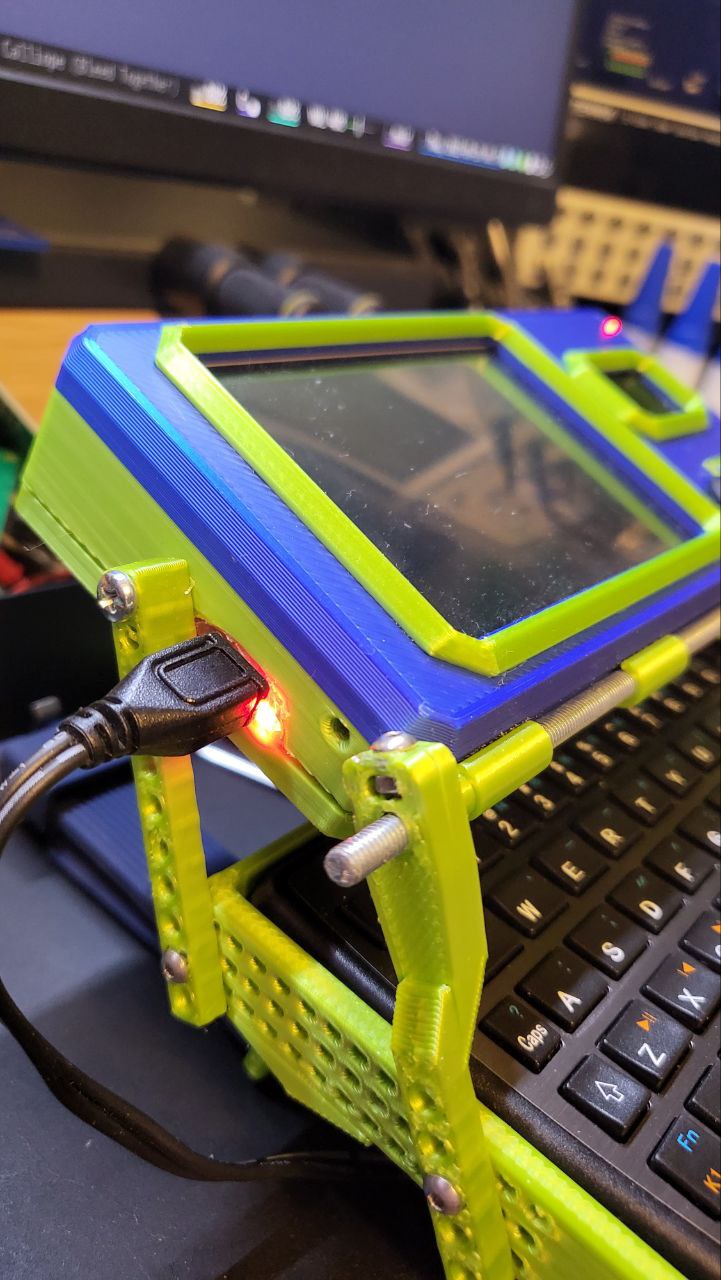
The battery charger has two indication LEDs on the side but those wouldn't be visible inside the case so I moved them next to the USB connector and, of course, hotglued them there. Hot glue proved to be a bad choice for that as, since there is mechanical strain from the charging cable and heat from the charging process it didn't hold well. But then I used a trick with super glue and baking soda which a good friend recently showed me (@izumitelj): when you need to fill some space and don't need/want to use epoxy, just mix the baking soda and super glue (it cures really fast so in this case it's best to just put a bit of glue and carefully add baking soda and repeat).

I didn't had any fitting ADCs so I don't have the battery voltage measurement (for now).
As for the straps, at some point I got a number of wrist straps for my smart watch so I went with that.
A Map Of All Our Failures
Besides the successful reference to My Dying Bride's album in the title, most of the other things I did in the last day weren't successful.
So, after completing mechanical stuff I went to complete (or at least do something) the software side. First thing was the thermal sensor. I had some code I previously used to show the 16x16 pixel image (based on this https://github.com/pimoroni/mlx90640-library) but the code complained that there's no sensor. After scanning the I2C bus and additionally disconnecting the sensor and checking it with a different device (BTW Flipper Zero is awesome when you quickly need to check I2C device) it turned out the sensor was dead. I don't know how but most likely I somehow killed it with static electricity. So, one of the coolest features was lost.
While searching through some boxes I found the MAX11644 ADC so I decided to at least add it to be able to measure the battery voltage. Long story short, after some battling with configuration registers that was also unsuccessful. The deadline was approaching quickly so I decided to leave it as I can come back to that part later.
So, the voice recognition! Yeah, that also sortof failed. The microphone level was quite low and the recognition results I was getting from google were quite bad and slow. So yeah, although I could improve that there's no more time.
But since I already have something I decided to publish it either way...
Final touches
The final step was to adjust software. In the end I decided to go with terminal dashboard for the main view (using wtf dashboard https://wtfutil.com/), plain terminal for the terminal view and overlay the pi camera when needed.
After editing ~/.config/openbox/lxde-pi-rc.xml and adding
<application name="*">
    <decor>no</decor>
    <maximized>yes</maximized>
</application>
inside the "applications" section, I got all apps to start maximized and without window decorations. Additionally, I added my startup script to ~/.config/lxsession/LXDE-pi/autostart to trigger it on start.
And what does the startup script do? Well, first it runs the microphone waveform on oled display, then it starts two terminals, one with dashboard and another empty one and then it starts the controller.py script which takes care of everything else.
For switching between two lxterminals, I started them with a title parameter which allowed me to use xdotool to simply activate each one with "xdotool search --name windowtitle windowactivate" (shout out to Dobrica for that tip, https://blog.rot13.org/2010/07/focus-window-by-name-using-xdotool-and-awesome-window-manager.html).
The controller.py handles the motor (display open/close) and switches the terminals/camera view.
All of the code (together with 3D files) is available in the repository: https://bitbucket.org/igor_b/cyberdeck/src
So, in the end, is it usable? No. Is it easy to use? No, it's quite heavy and cumbersome. But how does it look? Super awesome!
And a bit more of open/close action: